Missions

Missions are the main form of gameplay in Deep Rock Galactic. Missions are selected from the Mission Terminal, located in front of the green hologram of Hoxxes IV on the first floor of the Space Rig, or by pressing the TAB key to view the browser. When selecting a mission, the host must first select a planetary region, then select a mission type. Some planetary regions are temporarily unavailable until the mission terminal refreshes. Every mission type can be played with up to 3 other players, or in solo (with or without Bosco). Completing missions will yield the player both ![]() credits and
credits and ![]() experience. Any crafting materials obtained during a mission will also be awarded to the player to spend on equipment upgrades and vanity items. A failed mission still has a reward, though only 25% of credits, experience, and mined minerals are retained.
experience. Any crafting materials obtained during a mission will also be awarded to the player to spend on equipment upgrades and vanity items. A failed mission still has a reward, though only 25% of credits, experience, and mined minerals are retained.
Every mission has a required primary objective, as well as an optional secondary objective which rewards extra credits and experience. Each selected mission also has a randomly generated name comprising of two parts, picked from two tables of words; a "First Name" table for the first half and a "Last Name" table for the second half.
Mission Types
There are currently nine mission types available to choose from. Each mission type has different objectives, and the generated cave systems vary based on mission type.
Completing the Conquer Hoxxes IV assignment will allow players to host any mission type, excluding Industrial Sabotage, which requires the Spec Ops: Industrial Sabotage assignment to be completed.
 Mining Expedition
- Main article: Mining Expedition
Mining Expeditions are the first mission available to new miners. They are characterized by a linear series of connected caves separated by dirt walls between them, with a "treasure room" full of resources at the end.
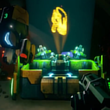
The primary objective is to collect and deposit the quota of ![]() Morkite into the M.U.L.E..
Morkite into the M.U.L.E..
The required quota of Morkite differs based off the mission length and complexity.
| Primary Objectives: |
| Possible Secondary Objectives: | ||
Reaching the required Morkite quota activates the escape button on the M.U.L.E., which calls for a Drop Pod and initiates the escape sequence. When pressed, players have five minutes to reach the Drop Pod after it lands.
 Egg Hunt
- Main article: Egg Hunt
Egg Hunt missions are characterized by a central starting room, typically connected by multiple dirt walls to one larger room with offshoot caves and tunnels.
The goal is to collect and deposit ![]() Alien Eggs hidden within the walls throughout the cave system into the provided M.U.L.E., along with any other resources. Eggs are identified by a large, spherical, purple mass of organic material, with a slight purple glow and small pieces of organic debris on the surface of walls they are buried within. Upon digging out an egg, a roar will sound and a group of bugs will spawn. There is also a chance that the extraction of an egg attracts a swarm. The amount of eggs which will cause an announced swarm is affected by mission length. Missions with 4 Alien Eggs will have 1 announced swarm, 6 Alien Eggs will have 2 announced swarms, and 8 Alien Eggs will have 3 announced swarms.
Alien Eggs hidden within the walls throughout the cave system into the provided M.U.L.E., along with any other resources. Eggs are identified by a large, spherical, purple mass of organic material, with a slight purple glow and small pieces of organic debris on the surface of walls they are buried within. Upon digging out an egg, a roar will sound and a group of bugs will spawn. There is also a chance that the extraction of an egg attracts a swarm. The amount of eggs which will cause an announced swarm is affected by mission length. Missions with 4 Alien Eggs will have 1 announced swarm, 6 Alien Eggs will have 2 announced swarms, and 8 Alien Eggs will have 3 announced swarms.
The required amount of Alien Eggs changes based off the level length.
| Primary Objectives: |
| Possible Secondary Objectives: | ||
Reaching the required Alien Egg quota activates the escape button on the M.U.L.E., which calls for a Drop Pod and initiates the escape sequence. When pressed, players have five minutes to reach the Drop Pod after it lands.
 On-site Refining
- Main article: On-site Refining
On-site Refining missions are characterized by one large cave full of enemies, where the Drop Pod and Mobile Refinery land, and one side cave. The refinery platform, which also serves as this mission's deposit point with its two grinders, is raised from the ground with four access ramps that fold out, a launch button that activates the extraction phase, headlights, and three pipeline access ports.
The objective is to locate Liquid Morkite sites, easily identifiable by a dense geyser of blue liquid. After calling Pumpjacks on the found wells, pipelines must be constructed and built, starting from the Mobile Refinery. Once all pumps are connected, pressing a button on the platform activates the refining process. From this point, swarms of enemies attack until the end of the mission. During the extraction of the liquids, leaks will appear on the pipeline grid and will need to be fixed to progress the objective.
The required quota of Liquid Morkite does not differ based off the mission length and complexity. Only the distance between the wells and the Refinery vary.
| Primary Objectives: |
| Possible Secondary Objectives: | ||
Once the quota of Liquid Morkite has been met, the launch button located on the refinery platform becomes active. At this time, enemy pressure significantly increases until the mission ends. Once pressed, the refinery head used for depositing minerals will detach from the platform and propel itself back to the Space Rig via a rocket. After a short wait, a Drop Pod lands in the cave which players have three minutes to reach.
 Salvage Operation
- Main article: Salvage Operation
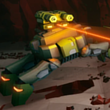
Salvage Operation is characterized by a small starting room which branches out into one giant cave with many Mini M.U.L.E. parts lying around and a broken Drop Pod.
The first objective is to search for broken Mini M.U.L.E.s, easily identifiable by either a beeping noise or a green visual beacon. Up to four Mini M.U.L.E. legs are found in the area of each broken M.U.L.E., but only three are required to begin repairing a Mini M.U.L.E. unit. Repairing each Mini M.U.L.E. rewards the team with what it was carrying, which is always Nitra and Gold.
Repairing each Mini M.U.L.E. will activate a button on the mission's provided M.U.L.E., which recalls all M.U.L.E.s to the broken Drop Pod. Resources then must be deposited on the side of the Drop Pod. The team must then repair a communications uplink which, once repaired, allows mission control to triangulate the pod's position. During this time the team must defend themselves from a large swarm and stay within a green sphere around the uplink or else the progress will slow down or even decrease. Getting downed in the sphere will count as if a player has left the area, and if the progress completely depletes this mission will instantly fail.
After triangulation is complete the team gets a breather while waiting for the Fuel Cells to drop down. After it arrives the team must link up the Fuel Cells to the drop pod with cords and then defend themselves within another green sphere, which players have to stay inside of for the fuel to fill the drop pod. Once this is completed, the team is free to move anywhere but must hold out for an additional two minutes until the Drop Pod is ready to leave, after which the team can escape.
The number of Mini M.U.L.E.s to salvage is dependent on the length of the mission.
| Primary Objectives: |
| Possible Secondary Objectives: | ||
 Point Extraction
- Main article: Point Extraction
Point Extraction missions are characterized by one large cave full of enemies in which the Drop Pod, shortly followed by a Minehead land in. The Minehead serves as this mission's deposit point with its two grinders, and has four ramps connecting it to the ground, a launch button that activates the extraction phase, two headlights which slowly rotate, and three turrets each with 600 rounds of ammunition. The turrets will disappear once all of their ammo has been spent. The longer the players stay in the mission, the larger the size of enemy groups that spawn.
The goal is to explore the large cavern and collect blue gems called ![]() Aquarqs that are hidden within the walls as well as optionally collecting an assigned Secondary Objective material. Aquarqs are identified by blue flecks of crystal on the surface of the walls they are buried within, as well as a slight blue glow emitting from the gem itself. Once the gems have been unearthed, they must be carried back to the mining platform and deposited into one of two slots in the mining head at the center of the platform. This mission is one of only two mission types featuring the "collect Dystrum" Secondary Objective.
Aquarqs that are hidden within the walls as well as optionally collecting an assigned Secondary Objective material. Aquarqs are identified by blue flecks of crystal on the surface of the walls they are buried within, as well as a slight blue glow emitting from the gem itself. Once the gems have been unearthed, they must be carried back to the mining platform and deposited into one of two slots in the mining head at the center of the platform. This mission is one of only two mission types featuring the "collect Dystrum" Secondary Objective.
The number of Aquarq to collect is dependent on the length of the mission.
| Primary Objectives: |
| Possible Secondary Objectives: | ||
Reaching the required Aquarq quota enables the launch button to be pressed on the Minehead. Launching the rocket detaches it, along with its deposit points, from the platform, initiates a two minute timer for the Drop Pod, and starts a swarm of enemies until the mission ends. After two minutes, a Drop Pod lands, which players have three minutes to reach.
 Escort Duty
- Main article: Escort Duty
Escort Duty missions are characterized by a large starting room, followed by several unconnected caves of varying sizes and enemy amounts.
The objective is to maintain and escort a Drilldozer until it reaches the Ommoran Heartstone. Players are provided with a M.U.L.E. to collect resources on the way. The Drilldozer is sent down in a cargo drop shortly after the Drop Pod, and must be manually started to begin moving. It is unable to be destroyed until the start button on the dozer is pressed. After starting the drill, waves of enemies continually attack the Drilldozer until it reaches a refuel stop. When reached, two fuel canisters become accessible on the back of the Drilldozer, and equipped with lasers they can collect ![]() Oil Shale . Once both canisters are full and re-inserted, the button to start the Drilldozer reactivates and must be pressed to reach the Ommoran Heartstone.
Oil Shale . Once both canisters are full and re-inserted, the button to start the Drilldozer reactivates and must be pressed to reach the Ommoran Heartstone.
Once the Ommoran Heartstone is reached, the Drilldozer must manually be started to begin extraction. The Ommoran Heartstone has four phases of extraction, and the first one will always be a wave of enemies, followed by a random selection any of these three attacks for the second phase: Flying Rocks, Ommoran Beamers, or Ommoran Crystal Traps. The third phase is another swarm of enemies, which is followed by a random selection of any of the Ommoran Heartstone's attacks (excluding the attack used in the second phase) for the fourth and final stage. At the end of the fourth phase, the Ommoran Heartstone lets out an explosion killing most enemies, exploding the Drilldozer and freeing the ![]() Ommoran Core . The core must then be collected and deposited into the M.U.L.E.
Ommoran Core . The core must then be collected and deposited into the M.U.L.E.
The amount of times the Drilldozer stops to refuel is dependent on mission length and complexity.
| Primary Objectives: |
| Possible Secondary Objectives: | ||
Depositing the Ommoran Heartstone Core enables the escape button on the M.U.L.E., which calls the Drop Pod and activates the escape sequence. Players then have 5 minutes to reach the Drop Pod after it lands.
 Elimination
- Main article: Elimination
Elimination is characterized by a central starting room, with multiple dirt walls leading to other rooms and tunnels.
The objective is to locate two or three cocoons, which contain Dreadnoughts. Players must fight and kill all the Dreadnoughts to complete the objective.
The required number of Dreadnoughts to kill is based on the length and complexity of the mission.
| Primary Objectives: |
| Possible Secondary Objectives: | ||
Upon successfully eliminating the Dreadnought targets, the button to call for a Drop Pod activates on the provided M.U.L.E., initiating the escape sequence when pressed. Players then have 5 minutes to reach the Drop Pod after it arrives.
 Industrial Sabotage
- Main article: Industrial Sabotage
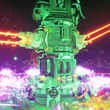
Industrial Sabotage missions are characterized by a small starting room which branches out into a large central room. The large central room contains the Data Vault, guarded by a Caretaker behind an impenetrable force field which must be disabled. Two sub rooms branch out from the main room, and each sub-room contains a power station that maintains the force field. Additionally, the entire map is littered with Rival Burst, Repulsion, and Sniper turrets, with small waves of Patrol Bots and Shredders which can occasionally warp in.
The first objective is to find and disable the power stations powering the force field protecting the Data Vault. Each of the large power cables leading out from the force field projector leads towards a power station. Once you find one of the two power stations, call in a Hacking Pod, retrieve Transmitter Nodes from the node dispenser on the pod, and toss them on the ground to create a transmission signal between the Hack-C Bot Unit and the power station. Once a connection is made, the hacking sequence can begin. During the hacking sequence, the Hacking Pod must be defended for a certain period of time while it disables the power station. The process is identical for both power stations.
Once both power stations are disabled, the force field surrounding the Data Vault is only running on backup power. Remove the backup batteries from the force field projector to fully disable the force field. When it is disabled, the Caretaker activates and must be defeated in three phases before the Data Rack is retrievable. The entire fight involves robotic appendages that the Caretaker uses to attack you as well as Area Shocks from the base of the vault and periodic large repulsive Plasma Barrier Waves. As the fight progresses, it gets more and more difficult.
| Primary Objectives: |
| Possible Secondary Objectives: | |||
Upon successfully defeating the Caretaker, the Data Vault will open and reveal the Data Rack, which must be deposited into the M.U.L.E. to activate the escape button. Pressing the button calls for a Drop Pod which players have five minutes to reach after it lands.
 Deep Scan
- Main article: Deep Scan
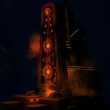
Deep Scan missions are characterized by a large, maze-like cave system connected by sprawling tunnels, and a single Morkite Geode far below the main caves.
The first objective is to find and scan three or five Resonance Crystals, by utilizing the HUD-mounted scanner and listening for a faint shimmering noise. After locating the position of a crystal, it must be dug out and linked with a Resonance Scanner Pod, called by interacting with a crystal. After linking the Resonance Scanner Pod to the Resonance Crystal, a single Deep Scan is completed.
The amount of Deep Scans to be completed depends on the length of the mission.
| Primary Objectives: |
| Possible Secondary Objectives: | ||
Once all crystals have been scanned, a Drillevator is dropped nearby. Starting the Drillevator begins the drill sequence, during which enemies constantly attack from above. During the drilling sequence, the Drillevator's claw tracks continually degrade, and if left unmaintained stop the Drillevator from moving unless any affected claw tracks are fully repaired.
After the Drillevator reaches the Morkite Geode, the swarm pressure stops, allowing players to collect the seven required ![]() Morkite Seeds. These seeds are obtained by destroying the green crystal clusters in the geode using a pickaxe, drills, or removing the terrain below them. Collecting and depositing these Morkite Seeds into the M.U.L.E enables the escape button. After the button is pressed to call the Drop Pod, players have 5 minutes to reach it by flying out of the geode using a pair of extraction Mark II Jet Boots, found on the Drillevator after the escape button has been pressed.
Morkite Seeds. These seeds are obtained by destroying the green crystal clusters in the geode using a pickaxe, drills, or removing the terrain below them. Collecting and depositing these Morkite Seeds into the M.U.L.E enables the escape button. After the button is pressed to call the Drop Pod, players have 5 minutes to reach it by flying out of the geode using a pair of extraction Mark II Jet Boots, found on the Drillevator after the escape button has been pressed.
 Deep Dives
- Main article: Deep Dives
A Deep Dive is a collection of three pre-seeded missions which have the same layout each time you play. Deep Dives and Elite Deep Dives both offer Matrix Core rewards, but Elite Deep Dives are a higher difficulty and different layout from the Deep Dive. Enemy spawns, excluding the Dreadnought objective, are never the same. Two primary objectives must be completed before exiting each stage, and each stage has a higher chance to have Mutators, while other features such as crafting materials and Machine Events spawns are disabled. All three levels must be played in sequence, with each mission granting extra rewards if completed. The status of each player's individual health and ammo as well as the Team Depository is carried over between missions.
Hazard Bonuses
- Main article: Hazard Bonus
Each mission has a Hazard Bonus, a multiplier for the total ![]() Credits and
Credits and ![]() Experience earned during a mission. This bonus is calculated based on the Hazard Level of a mission, its Cave Complexity, its Length, and any Warnings the mission has. The sum of each of these elements is the final Hazard Bonus, which is seen at the mission end screen.
Experience earned during a mission. This bonus is calculated based on the Hazard Level of a mission, its Cave Complexity, its Length, and any Warnings the mission has. The sum of each of these elements is the final Hazard Bonus, which is seen at the mission end screen.
Mutators
- Main article: Mutators
Mutators were released in Update 15: Mutation Warning. Missions may have Mutators, which are special events that may modify the mission for better or worse. Warnings are negative mutators and Anomalies are positive or neutral mutators.
A mission currently can have at most two Warnings, or one Warning and one Anomaly. Warnings increase the Hazard Bonus from 15% up to 50%.
| Warnings | |
|---|---|
| Cave Leech Cluster — +15% Hazard Bonus "Watch out for the ceiling, there is an unusual density of Cave Leeches." | |
| Duck and Cover — +30% Hazard Bonus "For reasons unknown, there are far more ranged enemies of all classes at this mission site. Seek cover!" | |
| Ebonite Outbreak — +20% Hazard Bonus "This mission site suffers from a massive Ebonite infestation. Rock and Stone - literally!" | |
| Elite Threat — +30% Hazard Bonus "Elite enemies are more common than usual. Make every bullet count!" | |
| Exploder Infestation — +20% Hazard Bonus "You will be attacked by an almost constant flow of Glyphid Exploder packs."' | |
| Haunted Cave — +30% Hazard Bonus "A slow, but invulnerable and deadly creature has been detected in this area. It will relentlessly chase you, throughout the mission. Do not let it get close." | |
| Lethal Enemies — +25% Hazard Bonus "Melee damage from all enemies hurts a lot more than usual." | |
| Lithophage Outbreak — +50% Hazard Bonus "The caves are infected with parasitic Rockpox, and must be purged using industrial cleaning tools." | |
| Low Oxygen — +20% Hazard Bonus "The mission area has particularly low concentrations of breathable air. Dwarves must frequently replenish their O2 by standing near one of the tanks attached to the M.U.L.E. and other devices." | |
| Mactera Plague — +20% Hazard Bonus "Most threats in this mission will come from the air, the caves are full of Mactera." | |
| Parasites — +15% Hazard Bonus "Something is eating the creatures from the inside out, and will go after you as soon as their hosts die." | |
| Regenerative Bugs — +15% Hazard Bonus "After a few seconds of not taking damage, the creatures will start recovering health." | |
| Rival Presence — +30% Hazard Bonus "Sensors have detected Rival presence in the area!" | |
| Shield Disruption — +30% Hazard Bonus "Magnetic interference is causing all shields to malfunction." | |
| Swarmageddon — +20% Hazard Bonus "Prepare yourself for a tsunami of Glyphid Swarmers!" | |
| Anomalies | |
| Blood Sugar "Toxins in the atmosphere drains your health, but crystalize the blood of Hoxxes Wildlife into Red Sugar. Kill to survive!" | |
| Critical Weakness "Hitting Weak Points hurts even more than usual." | |
| Double XP "Success will grant double the Experience Points of a standard mission." | |
| Gold Rush "We're rich! The mission area is full of extra rich gold veins." | |
| Golden Bugs "Every kill is worth gold, literally." | |
| Low Gravity "Mysterious gravitational irregularities result in lowered overall gravity in the mission area." | |
| Mineral Mania "The mission area is home to unusually high concentrations of regional mineral resources." | |
| Rich Atmosphere "A special mix of gasses in the air makes both Dwarves and aliens faster. As a side effect, everyone's voice is funnier than usual." | |
| Secret Secondary "Management has seen fit to issue you a second secondary objective. Get rich or die trying." | |
| Volatile Guts "The odd composition of local food sources means all enemies violently combust upon death, causing area damage." | |
Seasonal Events
During the year, Seasonal Events are run to celebrate varying real-world event counterparts. They often take the form of a special item to collect in the caves (one per mission) and will double the Season ![]() Performance Points received upon mission completion if deposited.
Performance Points received upon mission completion if deposited.
Random Events
Cargo Crates
 |
Cargo Crates can occasionally be found and must be repaired in a similar manner to a Mini M.U.L.E. -- there are two batteries encased into the ground nearby which emit a pulsing sound to assist with their location. When holding the batteries, a beeping sound plays. The intervals between beep decreases as the player holding the battery gets closer to the crate. Once both batteries are inserted and the Crate is repaired, a huge cache of crafting materials and a cosmetic item, either a weapon framework or victory move can be claimed. |
Lost Pack
 |
Lost Packs can be located after scanning a helmet surrounded by debris. The helmet emits a faint pulsing sound and light to assist with finding its location. Interacting with the helmet places a pink marker on the player's map, and at the pink marker, a room hidden within terrain is generated. Inside, a cache of crafting materials, gold, and the Lost Pack are found. Lost Packs contain a cosmetic item, such as an Armor Paintjob or Pickaxe Customization part which can be claimed. |
Machine Events
 |
Machine Events are optional objectives which can be activated once the player has at least one promoted class. There are currently four kinds of Machine Event in the game: Ebonite Mutation, Kursite Infection, Omen Modulator Exterminator and Tritilyte Crystal. Upon completion, they can be used to infuse a |
Data Cell
 |
Data Cell events are bonus objectives which can be encountered in a mission, most commonly when Season 1 or 2 are active in the Season Terminal. There are currently three events which reward Data Cells: Prospector Drone, Prospector Data Deposit and Rival Communications Router. Upon completion of any event, one |
Plagueheart
| Plagueheart events are bonus encounter that can be encountered in a mission, most commonly when Season 3 or 4 are active in the Season Terminal. There are currently three events which reward Plaguehearts: Meteor Impact, Meteor Shower and Rockpox Corruptor. Upon completion, a varying amount of |
Core Stone
 |
Core Stone events are a bonus encounter that can spawn in missions, most commonly in Season 5. There is currently only one Core Stone event, which when completed gives you the |
Creature Encounters
 |
Creature Encounters are rare unique and special denizens of the depths that the player may encounter while on a mission. There can be multiple encounters of different types during a given mission, but never more than one of each. All of these encounters are decided upon at mission generation. Additionally, special enemy swarms can consist of a large group of Praetorians, Mactera creatures, Glyphid Grunt species, Swarmers or even a Dreadnought. |
| Creature Encounters | ||
|---|---|---|
 |
BET-C 5% spawn chance |
An autonomous Battle M.U.L.E. -- a killer robot that has been parasitized by a pair of Xynarch Charge-Suckers. Now it is hostile to dwarves when roused from its slumber. When the Charge-Suckers have been forcibly removed, BET-C can then be repaired and reprogrammed to follow the players around, attacking enemies with its arsenal of weapons. |
| Dreadnought 1.5% spawn chance |
Mission Control will announce the incoming threat of a random Dreadnought type. These Dreadnoughts behave exactly the same way as the ones found in Elimination missions. | |
 |
Glyphid Crassus Detonator 3% spawn chance* |
When killed, the Crassus will generate a massive crater of *Crassus Detonators will not appear on Hazard 1 missions until the Conquer Hoxxes IV Assignment has been completed. |
 |
Golden Loot Bug 15% spawn chance |
This glowing, plump creature can be popped for 120 |
 |
Huuli Hoarder 15% spawn chance |
An evasive creature that will noisily flee from the player when disturbed. If it manages to get away, the Huuli Hoarder will burrow and disappear, taking its minerals with it. When hunted down and killed, it rewards a large amount of crafting resources. |
 |
Korlok Tyrant-Weed 5% spawn chance |
An organic, stationary threat with a protected core and regenerating shooting sprouts. When damaged, it can release healing pods that will regenerate its health. After it is destroyed, the Tyrant-Weed rewards |
| Nemesis 3% spawn chance |
The Nemesis is a specialized killing machine designed to lure dwarves in by synthesizing the voices of their comrades, before ambushing and crushing them with its pair of robotic appendages. Dwarves cannot escape after getting grabbed, causing them to go down, unless the Nemesis gets eliminated, or collides with terrain before it depletes your health. it moves slowly and can only grab if close. | |
Trivia
- As of Update 23, the 18th song in the soundtrack "Beneath the Crust" will play on the results screen upon mission completion.
- After release, Update 32: Roughnecks At Work added two mission types: On-site Refining and Escort Duty.
- Season 01: Rival Incursion added the mission type: Industrial Sabotage.
- Season 05: Drilling Deeper added the mission type: Deep Scan.
| |||||||||||
| |||||||||||