Glyphid Dreadnought
| “ | The Glyphid Dreadnought - the worst of the bunch, and arguably the worst thing Hoxxes has yet to throw at us. It's fast, smart, huge, and carries enough bio-weapons to fight a small war. It sports several preferred methods of attack, including firing actual fireballs at you, or sending cataclysmic shockwaves through the very ground you stand on. It has its abdomen exposed for heat dissipation like much of its kind, but unlike the rest this one has a tough outer shell that needs to be cracked before you can hit the weaker innards. And to make matters worse, it is capable of regenerating said shell within seconds. R&D's primary recommendation upon meeting a Dreadnought is simple: Run. |
| — Miner's Manual Description |
The Glyphid Dreadnought is a hostile boss Creature on Hoxxes. It has a 1 in 3 chance to be found inside the first Glyphid Cocoon in the Elimination gamemode, and a 1 in 2 chance for each subsequent cocoon unless it was spawned by the previous cocoon. It will attack the Dwarves once its cocoon is broken. It can also appear very rarely in place of a Swarm on Mining Expedition, Point Extraction, and On-site Refining mission types.
The Dreadnought is an offensive and defensive powerhouse, with dark spiky chitin covering the majority of its body and a blood-red skin tone. It has a gigantic mouth with large, razor sharp fangs. Its overall body shape is quite similar to the Glyphid Praetorian, but it has greatly increased stats. Its entire body is covered in unbreakable armor, even the parts which appear to have no armor plating. The only place it can be damaged is its abdomen, which itself starts out covered in a tough shell. To actually kill the Dreadnought, the shell around its abdomen must be broken, then it can start taking damage to its main health bar. The abdomen's shell is able to regrow back after enough time passes, or if the Dreadnought takes enough damage.
When a Dreadnought appears, its health appears as a giant bar at the top of the screen. It has a red Health bar and a yellow Shell bar.
Weakspot damage bonus modifications will increase damage to the abdomen but not the shell. Armor breaking will not increase damage to the shell nor will it pierce the Dreadnought's unbreakable armor.
The Dreadnought features a variety of attacks to use against the Dwarves. It uses common biting and claw swiping attacks used by other Glyphids, though with increased damage. It can also spew explosive fireballs which deal massive damage in a tight radius, and pheromone clusters which create Dreadnought-coloured Glyphid Swarmers upon hit and apply the Pheromone effect to all affected dwarves. The latter makes same swarmers appear over time near pheromoned dwarves, who in turn receive twice as less attention from all bugs but Dreadnought for the duration of the effect.
Its signature attack, the Trembling Stomp, deals extremely high damage in a wide radius around the Dreadnought itself. It prepares this attack by roaring, causing rocks to levitate, and then stomping the ground which creates volcanic spikes that impale the Dwarves. The roaring animation is supposed to provide time to get out of the way, but with higher numbers of players this animation speeds up tremendously - as does the damage of the stomp on higher Hazard levels which can instantly kill full-health dwarves.
The Dreadnought follows one player at a time, switching targets at semi-regular intervals. A new target is picked randomly, but the choice is affected by distance from the dreadnought to potential targets and by how many other creatures are attacking them. There is no explicit "aggro" meter that players can directly affect.[1]
Combat
Health and Armor
| Effective
Health Scaling |
Hazard Level | |||||||||||||||
|---|---|---|---|---|---|---|---|---|---|---|---|---|---|---|---|---|
| Normal Mission | DD | EDD | ||||||||||||||
| 1 | 2 | 3 | 4 | 5 | TE 1
|
TE 2
|
3 | 3.5 | 4.5 | 5 | 5.5 | |||||
| Player Count | 1000 | 1500 | 2500 | 3500 | 3750 | 5625 | 6562.5 | 2500 | 3000 | 3500 | 3750 | 3750 | Health | |||
| 2000 | 2000 | 2750 | 3750 | 4000 | 6000 | 7000 | 2750 | 3250 | 3750 | 4000 | 4000 | |||||
| 3000 | 3500 | 4500 | 5000 | 6000 | 9000 | 10500 | 4500 | 4750 | 5500 | 6000 | 6000 | |||||
| 4000 | 5000 | 6000 | 8000 | 8500 | 12750 | 14875 | 6000 | 7000 | 8000 | 8000 | 8500 | |||||
| Player Count | 340 | 510 | 850 | 1190 | 1190 | 1785 | 2082.5 | 850 | 1020 | 1190 | 1190 | 1190 | Shell | |||
| 680 | 680 | 935 | 1275 | 1360 | 2040 | 2380 | 935 | 1020 | 1190 | 1360 | 1190 | |||||
| 1020 | 1190 | 1530 | 1700 | 2040 | 3060 | 3570 | 1530 | 1700 | 1870 | 2040 | 1870 | |||||
| 1360 | 1700 | 2040 | 2720 | 2890 | 4335 | 5057.5 | 2040 | 2380 | 2720 | 2890 | 2720 | |||||
Attacks
| AoE Melee Attack | |||||||||||||||
|---|---|---|---|---|---|---|---|---|---|---|---|---|---|---|---|
| Area Damage | Hazard Level | ||||||||||||||
| Normal Mission | DD | EDD | |||||||||||||
| 1 | 2 | 3 | 4 | 5 | PV 1 | PV 2 | 3 | 3.5 | 4.5 | 5 | 5.5 | ||||
| Player Count | 12.5 | 17.5 | 30 | 50 | 70 | 105 | 140 | 30 | 37.5 | 57.5 | 70 | 75 | |||
| 12.5 | 20 | 32.5 | 53.75 | 75 | 112.5 | 150 | 32.5 | 40 | 61.25 | 75 | 80 | ||||
| 12.5 | 22.5 | 35 | 57.5 | 80 | 120 | 160 | 35 | 42.5 | 65 | 80 | 85 | ||||
| 12.5 | 25 | 37.5 | 62.5 | 85 | 127.5 | 170 | 37.5 | 45 | 70 | 85 | 90 | ||||
| Details | |||||||||||||||
| Damage Type | Melee | Radius: 2.5 m | |||||||||||||
| Max. Angle | 180° | ||||||||||||||
| AoE Attack | |||||||||||||||
|---|---|---|---|---|---|---|---|---|---|---|---|---|---|---|---|
| Area Damage | Hazard Level | ||||||||||||||
| Normal Mission | DD | EDD | |||||||||||||
| 1 | 2 | 3 | 4 | 5 | PV 1 | PV 2 | 3 | 3.5 | 4.5 | 5 | 5.5 | ||||
| Player Count | 42.5 | 59.5 | 102 | 170 | 238 | 357 | 476 | 102 | 127.5 | 195.5 | 238 | 255 | |||
| 42.5 | 68 | 110.5 | 182.75 | 255 | 382.5 | 510 | 110.5 | 136 | 208.25 | 255 | 272 | ||||
| 42.5 | 76.5 | 119 | 195.5 | 272 | 408 | 544 | 119 | 144.5 | 221 | 272 | 289 | ||||
| 42.5 | 85 | 127.5 | 212.5 | 289 | 433.5 | 578 | 127.5 | 153 | 238 | 289 | 306 | ||||
| Details | |||||||||||||||
| Damage Type | Explosive | Radius: 6.75 m | |||||||||||||
| Knockback Force | Horizontal: 0 m Vertical: 1 m | ||||||||||||||
| AoE Projectile | |||||||||||||||
|---|---|---|---|---|---|---|---|---|---|---|---|---|---|---|---|
| Area Damage | Hazard Level | ||||||||||||||
| Normal Mission | DD | EDD | |||||||||||||
| 1 | 2 | 3 | 4 | 5 | PV 1 | PV 2 | 3 | 3.5 | 4.5 | 5 | 5.5 | ||||
| Player Count | 15 | 21 | 36 | 60 | 84 | 126 | 168 | 36 | 45 | 69 | 84 | 90 | |||
| 15 | 24 | 39 | 64.5 | 90 | 135 | 180 | 39 | 48 | 73.5 | 90 | 96 | ||||
| 15 | 27 | 42 | 69 | 96 | 144 | 192 | 42 | 51 | 78 | 96 | 102 | ||||
| 15 | 30 | 45 | 75 | 102 | 153 | 204 | 45 | 54 | 84 | 102 | 108 | ||||
| Details | |||||||||||||||
| Damage Type | Explosive + Fire | Radius: 2.75 m | |||||||||||||
| Projectile | |||||||||||||||
|---|---|---|---|---|---|---|---|---|---|---|---|---|---|---|---|
| Damage Amount | Hazard Level | ||||||||||||||
| Normal Mission | DD | EDD | |||||||||||||
| 1 | 2 | 3 | 4 | 5 | PV 1 | PV 2 | 3 | 3.5 | 4.5 | 5 | 5.5 | ||||
| Player Count | 0.05 | 0.07 | 0.12 | 0.2 | 0.28 | 0.42 | 0.56 | 0.12 | 0.15 | 0.23 | 0.28 | 0.3 | |||
| 0.05 | 0.08 | 0.13 | 0.215 | 0.3 | 0.45 | 0.6 | 0.13 | 0.16 | 0.245 | 0.3 | 0.32 | ||||
| 0.05 | 0.09 | 0.14 | 0.23 | 0.32 | 0.48 | 0.64 | 0.14 | 0.17 | 0.26 | 0.32 | 0.34 | ||||
| 0.05 | 0.1 | 0.15 | 0.25 | 0.34 | 0.51 | 0.68 | 0.15 | 0.18 | 0.28 | 0.34 | 0.36 | ||||
| Details | |||||||||||||||
| Damage Type | Typeless | ||||||||||||||
| AoE Projectile | |||||||||||||||
| Area Damage | Hazard Level | ||||||||||||||
| Normal Mission | DD | EDD | |||||||||||||
| 1 | 2 | 3 | 4 | 5 | PV 1 | PV 2 | 3 | 3.5 | 4.5 | 5 | 5.5 | ||||
| Player Count | 0 | 0 | 0 | 0 | 0 | 0 | 0 | 0 | 0 | 0 | 0 | 0 | |||
| 0 | 0 | 0 | 0 | 0 | 0 | 0 | 0 | 0 | 0 | 0 | 0 | ||||
| 0 | 0 | 0 | 0 | 0 | 0 | 0 | 0 | 0 | 0 | 0 | 0 | ||||
| 0 | 0 | 0 | 0 | 0 | 0 | 0 | 0 | 0 | 0 | 0 | 0 | ||||
| Details | |||||||||||||||
| Damage Type | Typeless | Radius: 3 m | |||||||||||||
| Duration | 10 s | ||||||||||||||
| Status Effect | Pheromones for 10 s | ||||||||||||||
| Carving Attack | |||||||||||||||
|---|---|---|---|---|---|---|---|---|---|---|---|---|---|---|---|
| Area Damage | Hazard Level | ||||||||||||||
| Normal Mission | DD | EDD | |||||||||||||
| 1 | 2 | 3 | 4 | 5 | PV 1 | PV 2 | 3 | 3.5 | 4.5 | 5 | 5.5 | ||||
| Player Count | 7.5 | 10.5 | 18 | 30 | 42 | 63 | 84 | 18 | 22.5 | 34.5 | 42 | 45 | |||
| 7.5 | 12 | 19.5 | 32.25 | 45 | 67.5 | 90 | 19.5 | 24 | 36.75 | 45 | 48 | ||||
| 7.5 | 13.5 | 21 | 34.5 | 48 | 72 | 96 | 21 | 25.5 | 39 | 48 | 51 | ||||
| 7.5 | 15 | 22.5 | 37.5 | 51 | 76.5 | 102 | 22.5 | 27 | 42 | 51 | 54 | ||||
| Details | |||||||||||||||
| Damage Type | Melee | Attack Radius: 5 m | |||||||||||||
| Max. Angle | 180° | ||||||||||||||
| Carve Radius | 2.5 m | ||||||||||||||
Gallery
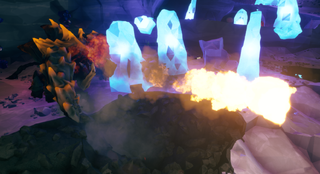
Ignited Projectile
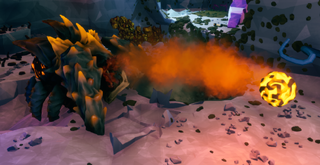
Swarm Bladder

Trembling Stomp


Trivia
- Glyphid Dreadnoughts are implied to be able to "turn into something even worse" if left to pupate for too long, according to Mission Control. It is currently unknown what it would become in such a case.
- There used to be a glitch in which the Dreadnought would rotate during stationary phases, such as during a roar, when players tried to get behind it, covering its weakspot. This was later patched in Update 33: New Frontiers.
References
| ||||||||||||||||||||||||||||||||||||||||