Rival Burst Turret
(Redirected from Burst Turret)
Jump to navigation
Jump to search
 |
This article is a stub. You can help Deep Rock Galactic Wiki by expanding it. |
 |
This article may need cleanup to meet quality standards.
Please help improve this if you can. The Discussion page may contain suggestions. |
This article may need cleanup to meet quality standards.
Please help improve this if you can. The Discussion page may contain suggestions.
Please help improve this if you can. The Discussion page may contain suggestions.
This page is possibly not up to date. It was last updated for Season 02: Rival Escalation
Updated for U36
| “ | The Burst Turret is protected by an impenetrable barrier and lie in wait for intruders. They're set up around Rival Prospecting Facilities to protect the Power Stations that keep the shield around the vault intact. Once its sensors pick up intruder movement, it will lower its barriers and attack! |
| — Miner's Manual Description |
The Rival Burst Turret is a defensive emplacement from Rival Tech. Several of them will appear exclusively in Industrial Sabotage missions and rival presence missions. They start mounted on the ground with an orange directional shield in front of them, but if a dwarf steps in range they will drop the shield and begin attacking.
A Rival Burst Turret only has one attack, which is to fire bursts of 6 orange lasers at any dwarf in range. While these can be avoided with quick movement, they are fired in quick succession and with a short time between each burst which makes getting behind cover quickly an advisable option.
Health and Armor
| Effective
Health Scaling |
Hazard Level | ||||||||||||||
|---|---|---|---|---|---|---|---|---|---|---|---|---|---|---|---|
| Normal Mission | DD | EDD | |||||||||||||
| 1 | 2 | 3 | 4 | 5 | TE 1
|
TE 2
|
3 | 3.5 | 4.5 | 5 | 5.5 | ||||
| Player Count | 337.5 | 487.5 | 600 | 750 | 900 | 1350 | 1575 | 600 | 637.5 | 825 | 900 | 975 | |||
| 412.5 | 562.5 | 675 | 750 | 900 | 1350 | 1575 | 675 | 712.5 | 825 | 900 | 975 | ||||
| 525 | 675 | 750 | 900 | 1050 | 1575 | 1837.5 | 750 | 825 | 975 | 1050 | 1125 | ||||
| 637.5 | 750 | 825 | 975 | 1125 | 1687.5 | 1968.75 | 825 | 900 | 1050 | 1125 | 1200 | ||||
Attacks
| Projectile | |||||||||||||||
|---|---|---|---|---|---|---|---|---|---|---|---|---|---|---|---|
| Damage Amount | Hazard Level | ||||||||||||||
| Normal Mission | DD | EDD | |||||||||||||
| 1 | 2 | 3 | 4 | 5 | PV 1 | PV 2 | 3 | 3.5 | 4.5 | 5 | 5.5 | ||||
| Player Count | 1.5 | 2.1 | 3.6 | 6 | 8.4 | 12.6 | 16.8 | 3.6 | 4.5 | 6.9 | 8.4 | 9 | |||
| 1.5 | 2.4 | 3.9 | 6.45 | 9 | 13.5 | 18 | 3.9 | 4.8 | 7.35 | 9 | 9.6 | ||||
| 1.5 | 2.7 | 4.2 | 6.9 | 9.6 | 14.4 | 19.2 | 4.2 | 5.1 | 7.8 | 9.6 | 10.2 | ||||
| 1.5 | 3 | 4.5 | 7.5 | 10.2 | 15.3 | 20.4 | 4.5 | 5.4 | 8.4 | 10.2 | 10.8 | ||||
| Details | |||||||||||||||
| Damage Type | Kinetic | ||||||||||||||
Gallery
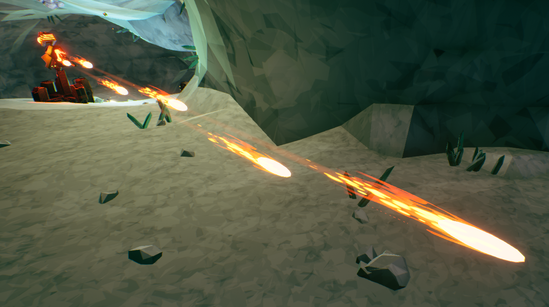
Laser Barrage

| ||||||||||||||||||||||||||||||||||||||||