Equipment

Deep Rock Galactic provides their employees with a huge arsenal of Equipment to choose from, designed to assist the Dwarves in extracting resources and eliminating threats. All of the classes carry several items of Equipment at once - a Primary Weapon, a Secondary Weapon, two Support Tools and a Throwable item (such as a grenade).
For weapons, a Dwarf has three choices for their Primary and Secondary Weapon slots. The alternative choices for a weapon slot must be unlocked through an Equipment License and then purchasing said weapons. Support Tools assist the Dwarves with mobility and utility - every class has a unique pair of Support Tools related to their job. Finally, a class can pick from one of four different Throwable options, though the latter three choices must be unlocked and purchased first.
Alongside these items, every Dwarf carries the same basic toolkit - a Pickaxe to extract resources and deal melee damage, an Armor Undersuit, the Laser Pointer to mark points of interest to the team, the Terrain Scanner which acts as a 3-D map, and throwable Flares which serve as temporary light sources.
Alongside personal Equipment, the Dwarves also make use of various Support Drops and Drones to assist them in the caves. Most of these only appear in certain situations, such as Bosco, which is only usable in Solo missions, designed to assist lone Dwarves with mining and combat.
Most types of Equipment can be modified through the Equipment Terminal. Players spend ![]() Credits and crafting materials extracted from the caves to improve their gear in various ways. Players can also equip Weapon Overclocks on their Primary and Secondary Weapons, which can improve or alter the function of the weapon.
Credits and crafting materials extracted from the caves to improve their gear in various ways. Players can also equip Weapon Overclocks on their Primary and Secondary Weapons, which can improve or alter the function of the weapon.
 Driller
| Primary | |||||||||||
|---|---|---|---|---|---|---|---|---|---|---|---|
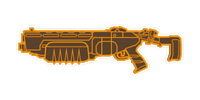
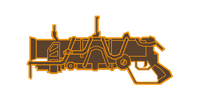
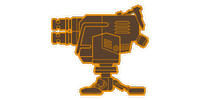
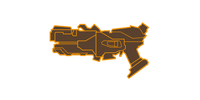
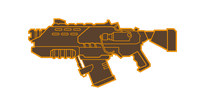
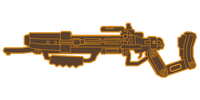
 CRSPR Flamethrower Heavy Weapon |
 Cryo Cannon Heavy Weapon |
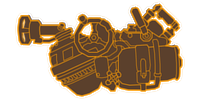 Corrosive Sludge Pump Heavy Weapon | |||||||||
| Secondary | |||||||||||
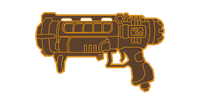
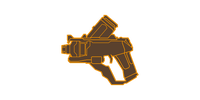
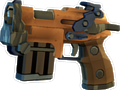
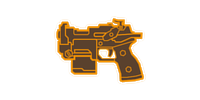 Subata 120 Pistol |
 Experimental Plasma Charger Pistol |
 Colette Wave Cooker Submachine Gun | |||||||||
| Equipment | |||||||||||
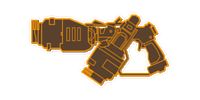
 Reinforced Power Drills Traversal Tool |
 Satchel Charge High Explosive |
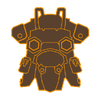 "Mole" Armor Rig Armor Undersuit | |||||||||
| Throwables | |||||||||||
 Impact Axe Throwable |
 High Explosive Grenade Throwable |
 Neurotoxin Grenade Throwable |
 Springloaded Ripper Throwable | ||||||||
 Engineer
| Primary | |||||||||||
|---|---|---|---|---|---|---|---|---|---|---|---|
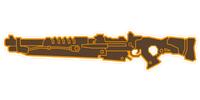
 "Warthog" Auto 210 Shotgun |
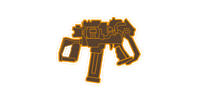 "Stubby" Voltaic SMG Submachine Gun |
 LOK-1 Smart Rifle Submachine Gun | |||||||||
| Secondary | |||||||||||
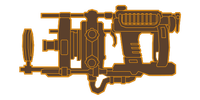
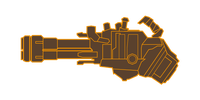
 Deepcore 40mm PGL Heavy Weapon |
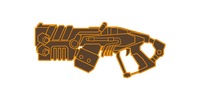
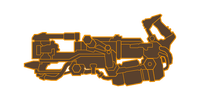 Breach Cutter Heavy Weapon |
 Shard Diffractor Heavy Weapon | |||||||||
| Equipment | |||||||||||
 Platform Gun Traversal Tool |
 LMG Gun Platform Sentry Gun |
"Owl" Armor Rig Armor Undersuit | |||||||||
| Throwables | |||||||||||
 L.U.R.E. Throwable |
 Plasma Burster Throwable |
 Proximity Mine Throwable |
 Shredder Swarm Throwable | ||||||||
 Gunner
| Primary | |||||||||||
|---|---|---|---|---|---|---|---|---|---|---|---|
 "Lead Storm" Powered Minigun Heavy Weapon |
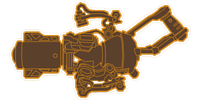
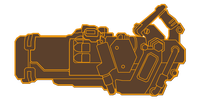
 "Thunderhead" Heavy Autocannon Heavy Weapon |
 "Hurricane" Guided Rocket System Heavy Weapon | |||||||||
| Secondary | |||||||||||
 "Bulldog" Heavy Revolver Revolver |
 BRT7 Burst Fire Gun Pistol |
 ArmsKore Coil Gun Pistol | |||||||||
| Equipment | |||||||||||
 Zipline Launcher Traversal Tool |
 Shield Generator Support Tool |
"Barracuda" Armor Rig Armor Undersuit | |||||||||
| Throwables | |||||||||||
 Sticky Grenade Throwable |
 Incendiary Grenade Throwable |
 Cluster Grenade Throwable |
 Tactical Leadburster Throwable | ||||||||
 Scout
Scout
| Primary | |||||||||||
|---|---|---|---|---|---|---|---|---|---|---|---|
 Deepcore GK2 Assault Rifle |
 M1000 Classic Semi-Automatic Rifle |
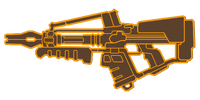 DRAK-25 Plasma Carbine Assault Rifle | |||||||||
| Secondary | |||||||||||
 Jury-Rigged Boomstick Shotgun |
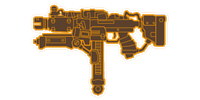
 Zhukov NUK17 Submachine Gun |
 Nishanka Boltshark X-80 Crossbow | |||||||||
| Equipment | |||||||||||
 Grappling Hook Traversal Tool |
 Flare Gun Support Tool |
"Fox" Armor Rig Armor Undersuit | |||||||||
| Throwables | |||||||||||
 Inhibitor-Field Generator Throwable |
 Cryo Grenade Throwable |
 Pheromone Canister Throwable |
 Voltaic Stun Sweeper Throwable | ||||||||
Common Tools
- The Pickaxe is used to dig terrain, mine minerals and deal melee damage. It can be swung by clicking the [MINE] ("Right Mouse" by default) button or by holding Left Trigger (LT). While melee damage inflicted with the Pickaxe is fairly low, it can unlock the Power Attack technique through Modifications, a damaging point-blank attack which can also instantly destroy any type of terrain.
- The High-Intensity Flare or Medium-Intensity Flare are thrown temporary light sources for illuminating the caves. They are thrown by pressing the [FLARES/FLASHLIGHT] ("F" by default) key or the B button. All Dwarves carry an unlimited amount, but only a few flares can be carried at one time and must recharge over time. Despite the name, there is no difference in light radius or strength between the two types of flare.
- The Laser Pointer is used to identify and mark points of interest. To use it, the player must hold down [LASERPOINTER] ("Left Ctrl" by default) key and then click to identify a point of interest. Marks are visible to the entire team on their HUD, and via a glowing sphere visible in the game world. Players can set personal waypoints which are only visible to them by pressing the [USE] ("E" by default) button.
- The Terrain Scanner is used to quickly generate a map of the miner's whereabouts. It is triggered by holding down the [TERRAIN SCANNER] ("TAB" and "M" by default) or by holding the View button. The map can by rotated by clicking and dragging. All players are represented with colored icons. Waypoints are also visible on the Terrain Scanner.
- The Hacking Device is a handheld device used to hack rival bots or technology. The device will be brought out and must be manually used once next to technology that can be hacked. The user of the device must then solve a short puzzle in order to successfully hack the target object.
Robots
- The APD-B317 (aka Bosco) only appears on solo missions, and is designed to help lone Dwarves with mining and combat. Bosco will follow the player and hover around them, and can be given commands by using the Laser Pointer to mark interests. Marking resources will make Bosco dig them up, while marking common rock will cause Bosco to project light. In addition Bosco can automatically seek out threats and eliminate them with its machine guns, and revive downed players. If another player joins the game, Bosco will self-destruct (and will return if said player leaves).
- The Mining Utility Lift Engine (aka M.U.L.E. or "Molly") is a quadruped robot which serves as a mobile depository for the minerals which are extracted by the Dwarves. It will attempt to follow a team of its own volition, but can also be summoned directly to a player with the [CALL M.U.L.E.] ("C" by default) key or the Y button. The MULE is capable of scaling walls and even walking on ceilings to get to a location. The MULE has infinite carrying space, and its transponder will activate once the mission's quotas are achieved. When said transponder is activated, the MULE will automatically return to the Drop Pod, leading the Dwarves back to its location.
- The Breakpoint Explosives Transport - Combat-Specification (aka BET-C or "Betsy") is another quadruped robot similar in shape to the MULE, only it is larger and outfitted with various weapons. Originally designed to assist with combat, the BET-C has been corrupted by a pair of Xynarch Charge-Suckers and can only be found in an inactive state. Once approached it will activate and open fire on the Dwarves, and the Xynarchs must be killed to disable the BET-C and initiate a system restart, which makes it friendly again. Once restarted, BET-C will follow the Dwarves for the rest of the mission and protect them with covering fire.
Support Drops
- The Resupply Pod is used to refill ammunition and health by 50%. It requires 80 Nitra to be summoned. To call a resupply, gather the required Nitra then press the [ORDER RESUPPLY] ("5" by default) key on the keyboard, choose a place to call the resupply, then click, or press down twice on the D-Pad, choose a place to call the resupply, then press Right Trigger (RT). Each Resupply Pod comes with four individual packages - one for each Dwarf to consume. Each package restores half of your maximum health and ammo without the Resupplier perk.
- The Drop Pod is a space shuttle outfitted with a large drill on the underside, designed to breach the surface of the planet and deploy the Dwarves into a digging site. It carries the Dwarves both to and from missions.
- The Personal Drop Pod is a miniaturized version of the standard Drop Pod designed to carry one Dwarf into the caves. It is used to introduce players who join a mission late after the initial Drop Pod deployment.
- The Mine Head is a defensive platform and specialized heavy lifter which only appears on Point Extraction. It replaces the MULE on Point Extraction missions, serving as a stationary depository and central defensive position. It is outfitted with floodlights, automatic sentry guns, a transponder and a rocket in the center which also doubles as a depository. When the transponder is activated, the rocket will launch. A few minutes later, the Drop Pod will touch down somewhere in the map to take the Dwarves home.
- The Nanite Bomb Dispenser is used to dispense volatile Nanite Bombs which are used to complete the Tritilyte Crystal machine event.
- The On-Site Refinery is a platform and specialized heavy lifter which only appears on On-Site Refining. It replaces the MULE on On-Site Refining missions, serving as a stationary depository and central defensive position. It is outfitted with floodlights, nodes to begin pipes from, a transponder and a rocket in the center which also doubles as a depository. When the transponder is activated, the pump sequence will begin, and when activated a second time, the rocket will launch. A few minutes later, the Drop Pod will touch down somewhere in the map to take the Dwarves home.
- The Drilldozer (also known as the Dozer for short, and affectionately nicknamed "Doretta" by the Dwarves) is a large, automated mining vehicle deployed during Escort to extract, an Ommoran Heartstone.
Rank Required for Gear Modification Tier
| Tier | Primary Weapon | Secondary | Equipment | Pickaxe | Throwables |
|---|---|---|---|---|---|
| 1st | 0 | 0 | 0 | 4 | 0 |
| 2nd | 4 | 6 | 5 | 8 | 5 |
| 3rd | 8 | 10 | 10 | 10 | |
| 4th | 12 | 14 | 15 | ||
| 5th | 16 | 18 |
The Primary Weapon Equipment License assignments are unlocked at Level ![]() 10 and Level
10 and Level ![]() 18.
18.
The Secondary Weapon Equipment License assignments are unlocked at Level ![]() 15 and Level
15 and Level ![]() 21.
21.
Standard Skins
- Main articles: Weapon Skins, Armor Skins
• Each weapon has the same set of standard paintjob, which can be unlocked by purchasing upgrades.
Default Paintjob — Unlocked by default.
First Stripe — Unlocked after 3 upgrade purchases.
Deepcore — Unlocked after 7 upgrade purchases.
The Company Special — Unlocked after all upgrades are purchased.
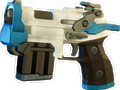
Below is a demonstration applied to the Subata 120.
Default Paintjob
"First Stripe"
"Deepcore"
"The Company Special"


Additional Weapon Skins can be obtained through the game with Cargo Crates, Matrix Cores, or Supporter Upgrade DLC.
• Each armor has a set of standard paintjob unique to each classes, which can be unlocked by purchasing upgrades.
Additional Armor Skins can be obtained through the game with Lost Packs, Assignments, Performance Pass or DLC.
Trivia
- Some weapon and upgrade descriptions reference R&D (which is short for Research and Development). This is the department of DRG responsible for creating new weapons and equipment for the Dwarves to use.
External Links
- A loadout creation and sharing application for the game Deep Rock Galactic, can be used to calculate cost. [GitHub]
| |||||||||||||||||||||||||||||||||||||||||||||||||||||||||||||||||||
| |||||||||||